Table of contents
1.0 Introduction
1.1
On 06 July 2013, a unit train carrying petroleum crude oilFootnote 1 operated by the Montreal, Maine & Atlantic Railway (MMA) derailed at mile 0.28 in Lac-Mégantic, Quebec. Numerous tank cars ruptured, and fire ensued.
1.2
Several fragments of rail recovered from the derailment site were brought to the Transportation Safety Board of Canada (TSB) Engineering Laboratory for examination.
2.0 Switch frog
2.1
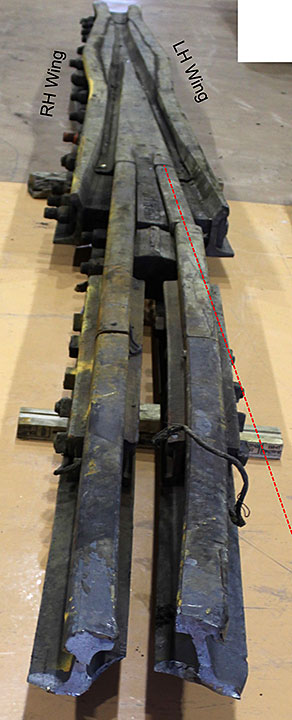
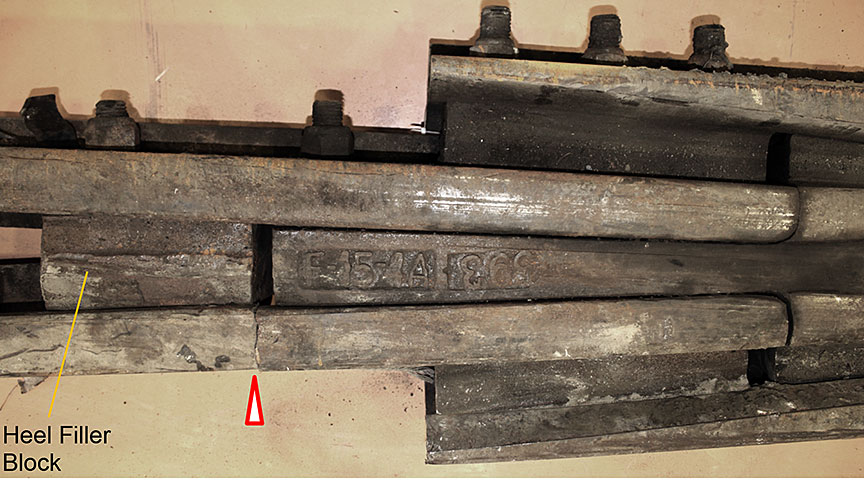
The frog is shown as received in Figure 1. Its overall design and dimensions suggested that it was a railbound manganese steel frog number 11. The identification markings on the frog components (Figure 2) confirmed this and indicated that the frog had been manufactured by Algoma for 115-pound RE rails. The last digit of the year stamp had been obliterated by the bolt hole (Figure 2a); however, the identification markings on the joint bars connecting the frog’s heel rails to the track frog railsFootnote 2 indicated that they were produced by Algoma in 1981. Therefore, it is likely that the frog was manufactured in 1980 or 1981.
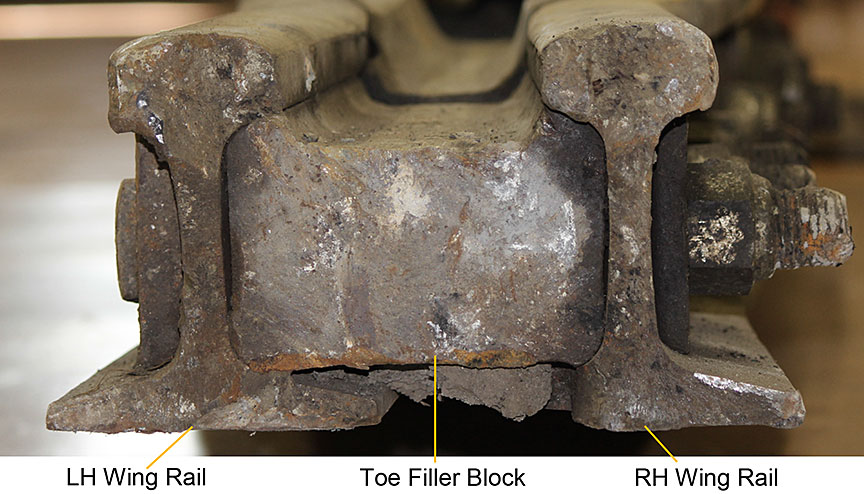
Figure 1. Frog, various views
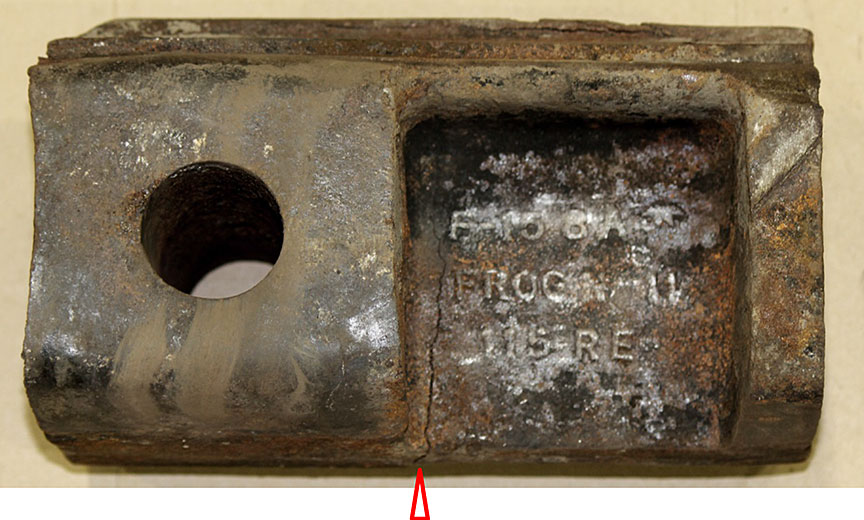
Figure 2. Frog identification markings
2.2
Rail wear measurements were performed on the frog components accessible for direct measurements using a rail wear gauge (see columns 1 to 4 of Table 1). The measured wear was below the limits specified for 115-pound RE rail – 5/8 inch vertical head wear and 3/4 inch gauge wear.
| Frog | 22-foot switch railsFootnote a | Rails connected by broken joint bar | |||||||
|---|---|---|---|---|---|---|---|---|---|
| RH heel rail | LH heel rail | RH frog rail | LH frog rail | RH point rail | LH point rail | RH closure rail | |||
| 1 | 2 | 3 | 4 | 5 | 6 | 7 | 8 | 9 | |
| Vertical head wear | 1/8 | 1/8 | 1/8 | 1/8 | 9/16 | 9/16 | 9/16 | 1/8 | 1/8 |
| Gauge side wear | 0 | 0 | 1/16 | 1/16 | 1/16 | 0 | 1/16 | 0 | 0 |
| Field side wear | 0 | 0 | 0 | 0 | 0 | 0 | 0 | 0 | 0 |
2.3
The frog rails connected to the heel rails were cut at the occurrence site to facilitate transportation to the TSB laboratory (the cut ends are seen in the lower portion of Figure 1d).
2.4
The frog wing rails fractured during the occurrence at the location of the front end of the toe filler block (Figure 1c). A close-up photograph of the wing rails’ fracture surfaces is shown in Figure 3. These fracture surfaces had a coarse texture typical for an overstress fracture mode. They were covered by oxide scale (as were most of the track components delivered for examination) due to exposure to the post-derailment fire. No pre-existing defects or fatigue cracks were observed on the fracture surfaces.
2.5
The left-hand (LH) heel rail had fractured at the location between the heel end of the frog core and the heel filler block (this location is indicated by the arrowheads in Figure 1b, Figure 1c and Figure 2a). A close-up photograph of the mating fracture surfaces of this rail is shown in Figure 4. These fracture surfaces also had a coarse topography typical for overstress fractures and were damaged by fire. The crack in the thin portion of the heel filler block (arrowed in Figure 2c) likely occurred at the same time as the heel rail fracture. These fractures were apparently caused by a force applied to the rail from the LH side. As a result of this force, the LH heel rail along with the connecting frog rail was pushed inwards towards the right-hand (RH) rail (refer to Figure 1c and 1d where the normal orientation of the LH rails is indicated by the red dotted lines). This force also bent the joint bars connecting the heel and frog rails (Figure 5). Note that 1 bolt was missing; the corresponding hole is circled in Figure 1a. The extent of wear and corrosion on all the holes in these joint bars and the rails was similar, and there was no sign that some holes had been exposed to the elements longer than the others. Therefore, it is likely that the missing bolt was broken and lost during the present occurrence.
2.6
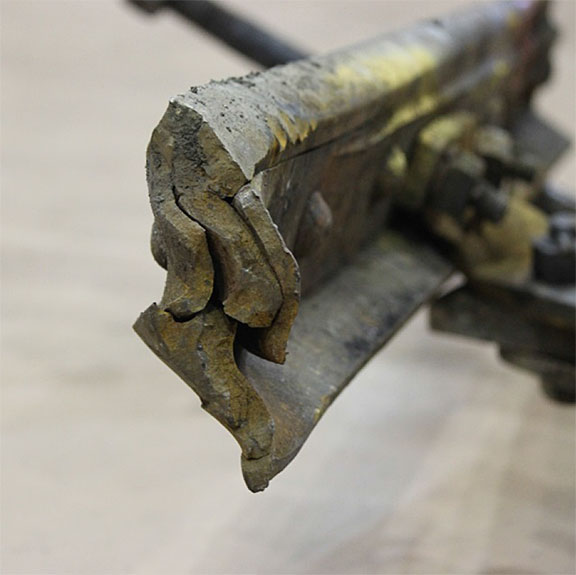
Figure 6 displays close-up photographs of the frog point. The point was damaged – the missing portion was about 5 inches long and 0.5 inch thick. The horizontal portion of the separation surface has a wavy appearance, typical for the interface between a weld-repaired area and the base material. This suggests that the frog point had been previously weld-repaired. The approximately vertical portion of the separation surface (about 5 inches from the point tip) had features characteristic of overstress fracture. It is considered likely that the missing piece broke off during the present occurrence. If the separation of this piece had predated the derailment, multiple wheel marks would be expected on the separation surface. There were wheel flange contact marks on the RH edge of the damaged portion of the point (Figure 6), but no clear marks anywhere else. Note also a mark from a wheel rim on the top of the remaining upper surface of the point (arrowed in Figure 6a). There was no dent at the edge of the vertical fracture surface corresponding to this wheel mark which suggests that this mark had appeared while the missing piece of the point was still in place.
Figure 6. Close-up photographs of the frog point
2.7
As mentioned in the previous paragraph, the frog point had likely been repaired by welding. Such repairs are allowed, and a frog should be repaired or removed when the wear reaches 0.5 inch from the top of the frog.Footnote 3 The missing portion of the frog point was about 0.5 inch thick, indicating that the point had been repaired when its wear approached the limit. There were also signs of repairs at other locations on the frog; an example is shown in Figure 7.
2.8
To summarize the frog examination: All the rail fractures and bending of the joint bars occurred due to overstress. The frog was over 30 years old, but no excessive wear or other pre-existing conditions that could have caused the derailment were observed. Therefore, it is concluded that the fractures and deformation observed on the frog components were likely a result of the derailment.
3.0 Switch points
3.1
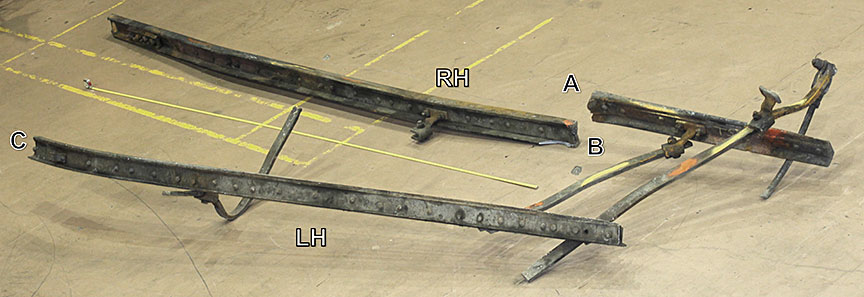
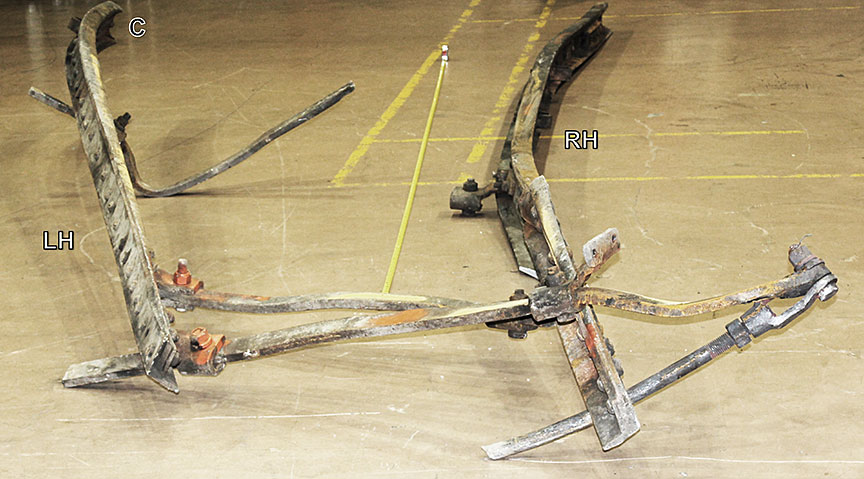
Three switch point rails were delivered for examination (Figure 8 and Figure 9). Their age was not determined.
Figure 8. 22-foot switch point rails, various views
Figure 9. 16.5-foot switch point rail photographed from 2 sides
3.2
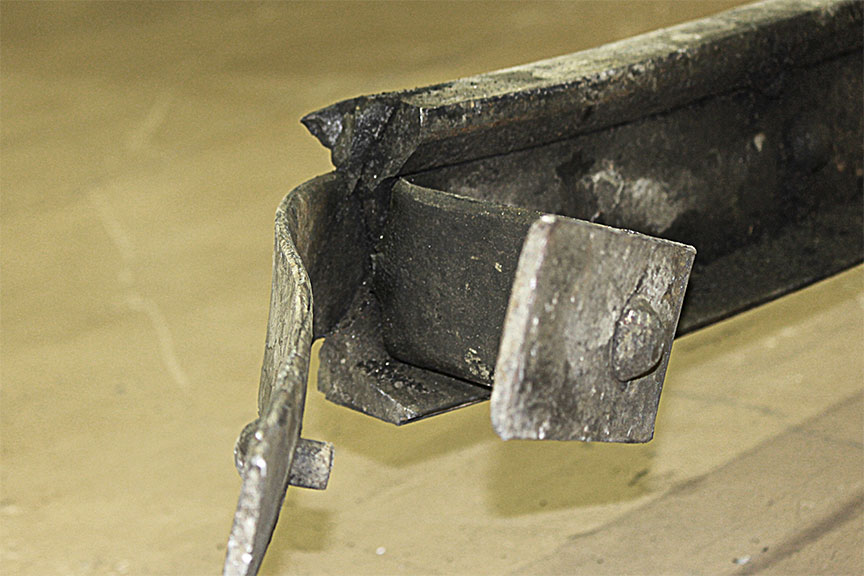
The 2 rails shown in Figure 8 were from a single 22-foot straight split switch in the RH configuration. Both rails and the switch operation mechanism were severely damaged during the derailment. The rail tips were unremarkable except for a slight detachment of the side plate on the LH point (Figure 10). The rail wear was within the limits specified for 115-pound RE rail (see columns 5 to 7 of Table 1 and paragraph 2.2).
Figure 10: Tips of the 22-foot switch point rails
3.3
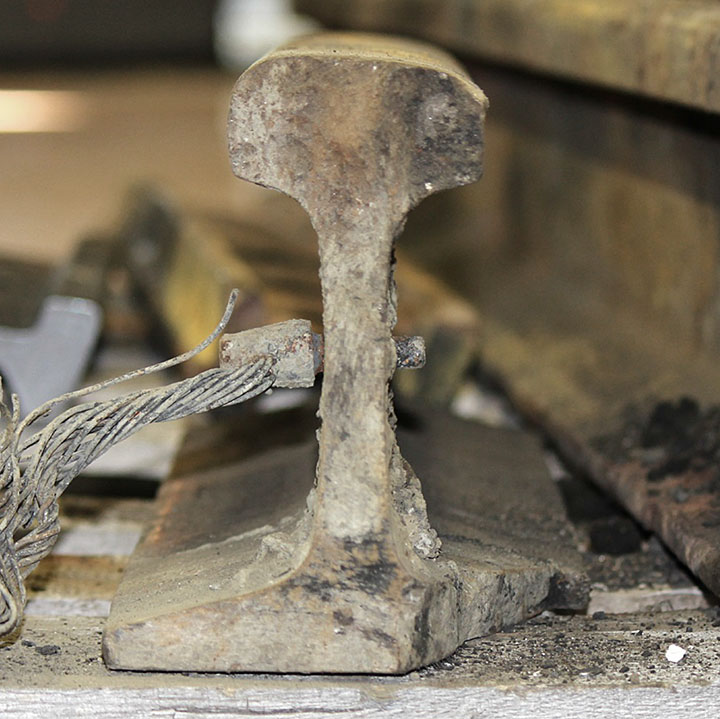
The RH switch point had a piece of stock rail about 2.5 feet long (indicated by the white bracket in Figure 8d) attached to it with joint bars. This stock rail had been cut at the occurrence site for ease of transportation to the TSB laboratory. Measurements of the rail length indicated that an approximately 1-foot section of rail, located about 5 feet from the tip, was missing (refer to A and B on Figure 8a and figure 8b). The fractures at locations A and B had occurred due to overstress with significant plastic deformation (Figure 11).
Figure 11. Separation surfaces of the RH 22-foot switch point
3.4
An approximately 8-foot long piece was missing from the heel of the LH switch point rail. The fracture surface at location C (Figure 8) was typical for an overstress fracture mode (Figure 12).
3.5
Attempts were made to measure the rail hardness; however, since the rails were exposed to the post-derailment fire, the measurement results were considered unreliable and are not reported here.
3.5
The other switch point rail (Figure 9) was from a 16.5-foot straight split switch. This rail was also deformed during the derailment. The rail fractured about 3 feet from the heel; the fracture surface was typical for overstress (Figure 13a). The switch point tip had nicks and burrs, and the side plate end was bent out (Figure 13b). The wear of this rail was not measured because the heel portion of rail was broken off. However, visually, the rail head did not appear worn. The railway operator reported that 16.5-foot yard switches had been recently installed in Lac-Mégantic with new rails.
Figure 13. Close-up photographs of the 16.5-foot switch point
3.6
In summary, the switch points were not excessively worn, and fractures due to overstress likely resulted from the derailment.
4.0 Broken joint bar
4.1
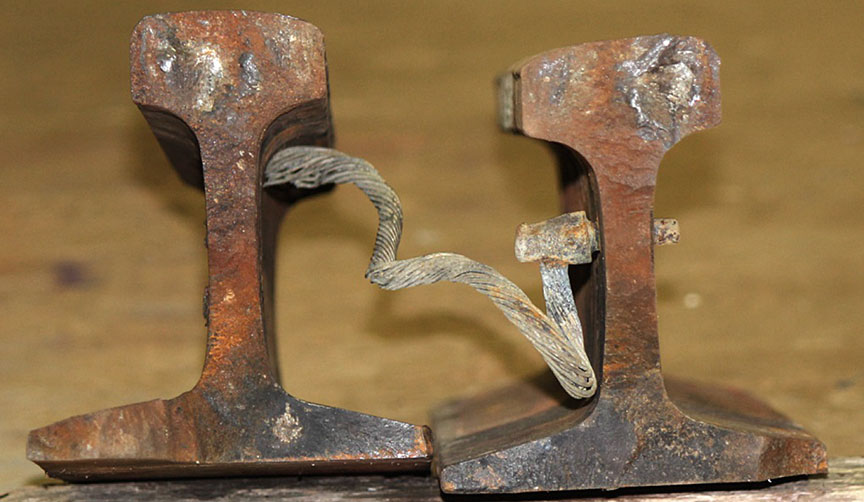
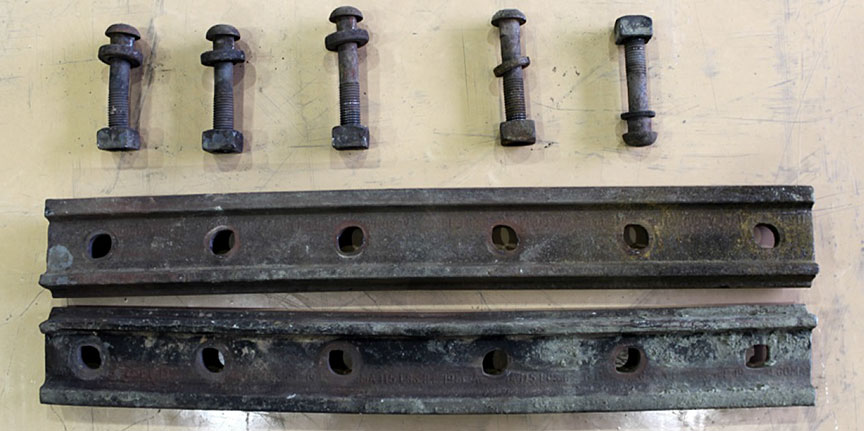
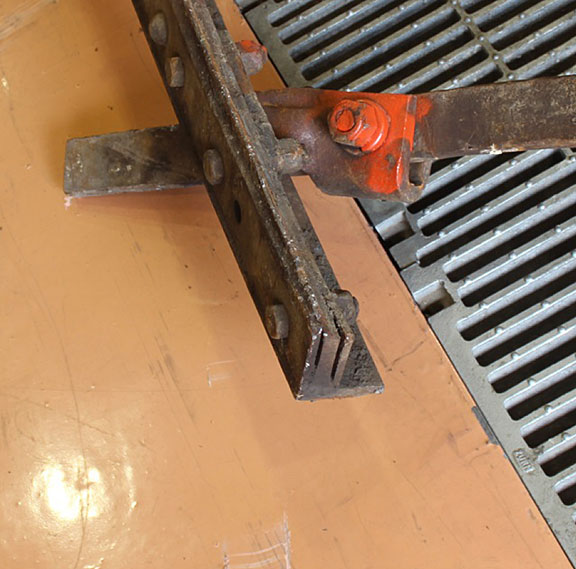
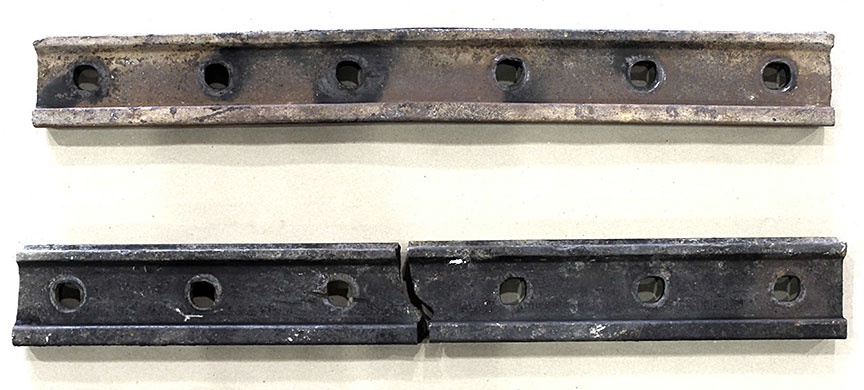
The 2 joined rail pieces are shown as received in Figure 14. One piece was about 8 feet long, the other – about 2 feet long. The longer rail piece had identification markings: ALGOMA C.C. 115 LBS RE 1983. There were no markings on the shorter rail piece. The joint bar on the gauge side was marked ALGOMA C.C. 115 LBS RE 1987. The only discernible markings on the field side joint bar were ALGOMA … 1975 … PAT 1947.
Figure 14. Rail joint, various views
4.2
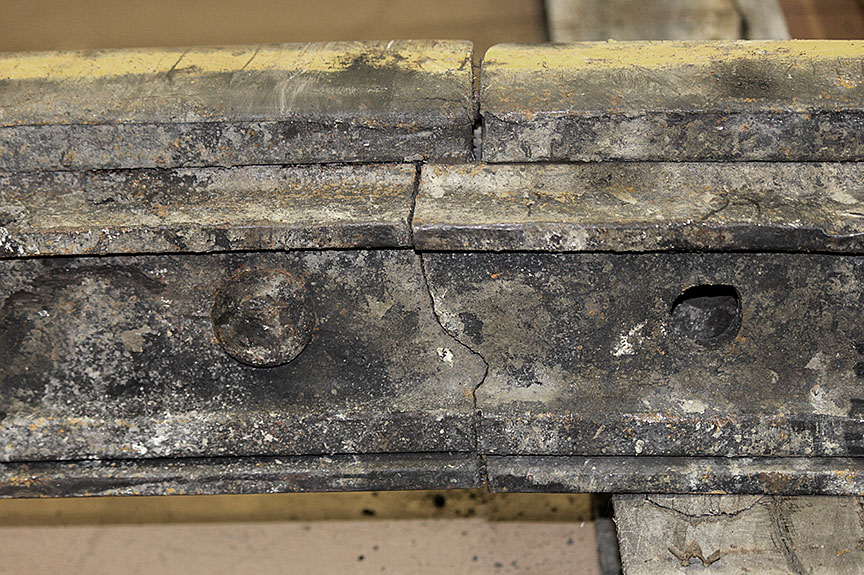
The rail head wear of both rails was small (see columns 8 and 9 of Table 1). The fractures of both rails had occurred due to overstress (Figure 15).
Figure 15. Close-up photographs of rail fracture surfaces
4.3
There was a crack in the gauge-side joint bar (see Figure 14b and Figure 14c). One of the bolts was missing; however, the extent of wear and corrosion on all the holes in the rails and the joint bars was similar, and there was no sign that some holes had been exposed to the elements longer than the others. Therefore, it is likely that the missing bolt was broken and lost during the present occurrence.
4.4
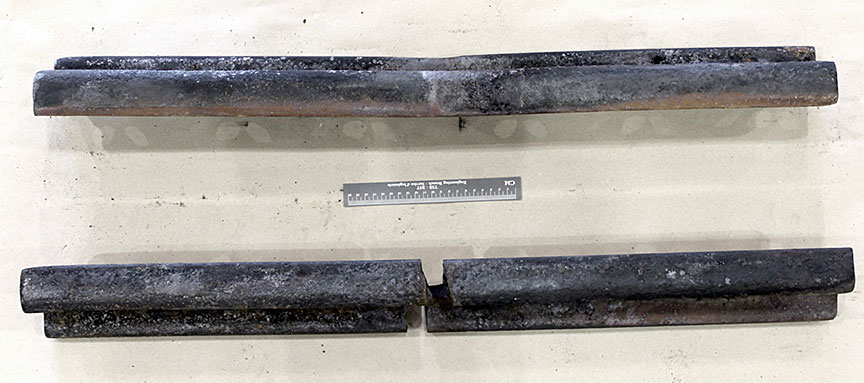
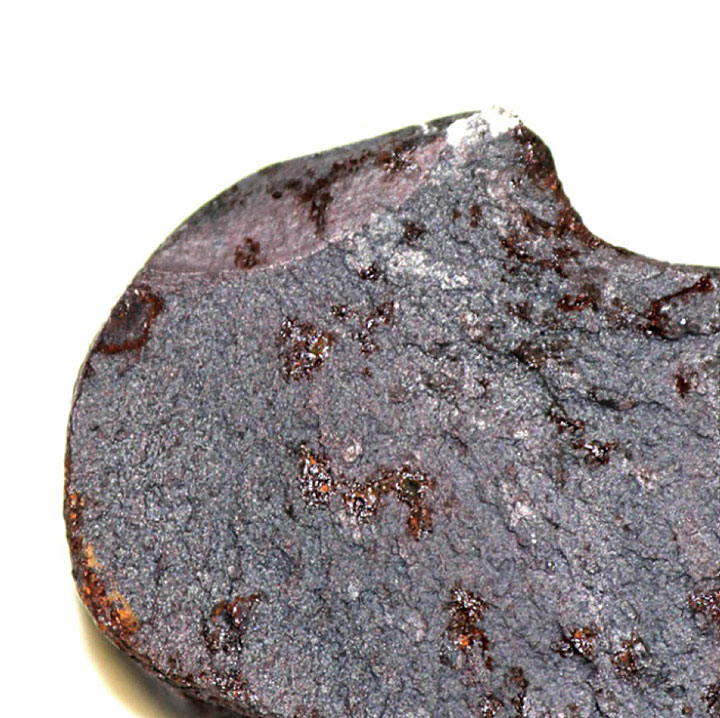
The rail joint was disassembled in order to examine the joint bars (Figure 16). The field-side joint bar was bent, but no cracks were observed in it. Photographs of the fracture surfaces of the gauge-side joint bar are shown in Figure 17. A small fatigue crack is visible in the top corner (arrowed in Figure 17a and Figure 17b and shown at higher magnification in Figure 17c and Figure 17d); the rest of the fracture surface was typical for overstress. This edge of the joint bar was located in the under-head fillet of the rail, and the fatigue crack initiated at the location where the two rails met. Such fatigue cracks are rather common in joint bars.Footnote 4 Figure 18 displays representative examples of fatigue cracks in joint bars previously examined by the TSB laboratory. These joint bars fractured under normal operating conditions as a result of an overstress extension of fatigue cracks that had grown to a critical size. Note that the fatigue crack in the present occurrence was only about 25% of the size of fatigue cracks shown in Figure 18. Therefore, it is unlikely that this small fatigue crack would have caused this joint bar to break under normal operation loads. Thus, even though this fatigue crack was a precursor for overstress fracture, the latter was mostly caused by overload during the derailment. The same excessive load during the derailment apparently caused bending of the field-side joint bar.
Figure 16. Disassembled joint bars, various views
Figure 17. Close-up photographs of 2 mating fracture surfaces of the gauge-side joint bar
Figure 18. Representative examples of joint bar fracture surfaces from previous occurrences
4.5
To summarize the joint bar fracture examination: There was a small fatigue crack in the gauge-side joint bar. However, this fatigue crack had not yet grown to a critical size, and the complete fracture of the joint bar was a result of an overload during the derailment.
5.0 Conclusion
5.1
The damage observed on the frog, switch points, and joint bars was likely a result of the derailment rather than its cause.
This lab report is part of the Transportation Safety Board of Canada's investigation report R13D0054.


